

Smoke Signals
Recording Matters, Part 5: Recording Basic Tracks
Hi! My name is Jeff Berkley. I’m from San Diego California. I am a musician, songwriter, engineer, and producer. I spend four or five days a week at Satellite studio in San Diego, producing records. I’ve made lots and lots of them. I’m very lucky to be able to find magic in all sorts of different types of musical situations, levels, styles, and vibes. Somehow, I can focus on what’s authentic and draw it out. I have no idea how I got here but, I sure did luck out!
This is part five of my attempt to somehow articulate my own recording method to you. As I’ve said before, it’s just my method. It works for me. It seems to work for others as well.
So far, we’ve chosen, written, or co-written, edited, and “memo demo’d” the songs. We’ve chosen a producer and studio. Last month we talked about choosing and preparing the musicians, and in the last column we talked about recording basic tracks
Now it’s time to edit basic tracks and get into the overdub process.
Now that we have recorded the basic tracks, it’s time to listen through those tracks and decide what magical moments end up on the record.
The basic tracks are the tracks you record when there are no tracks that exist yet, literally carving brand new grooves into the tape or acetate or hard drive.
As we talked about before, it’s always good to do several takes of each song. It doesn’t matter if it’s just a solo singer/songwriter who’s playing one instrument and singing or if it’s a full band with strings, horns, and a choir. As many takes as you can while the magic is still happening. Sometimes it’s easy to keep doing takes when people aren’t feeling it anymore. The law of diminishing returns really applies here.
When I edit, I put on headphones and go into my own world. I start by marking the songs. Most DAWs (digital audio workstation) have a way to mark the timeline however you see fit. I like to use markers like “count,” “top,” “verse one,” “chorus, one,” etc. This gives me a clear, visual map of the song and makes editing a little bit easier.
Once I’ve got the track mapped out, I can listen to all the takes. I generally start by listening to each take with everybody on. I like to make sure and listen to the actual performances they did, in the moment, with each other. So, make sure you’re playing back everyone together, take one and then take two and then take three, etc.
This is probably a really good time to talk about the click track and the grid. If you’re recording on tape, you may not have a click track, although lots of folks use drum machines and all sorts of different ways of creating a click track on tape. There are also digital strips you can add to the tape so you can use different interfaces to run the tape digitally and line it up with things on a computer.
Most of the time, these days, we are using some sort of DAW. Most of those have an editing grid that corresponds to your tempo and click track. Underneath the audio files, in your editing window, is a grid that you can “snap to.” You can move things around on the grid, so everything stays lined up with the click.
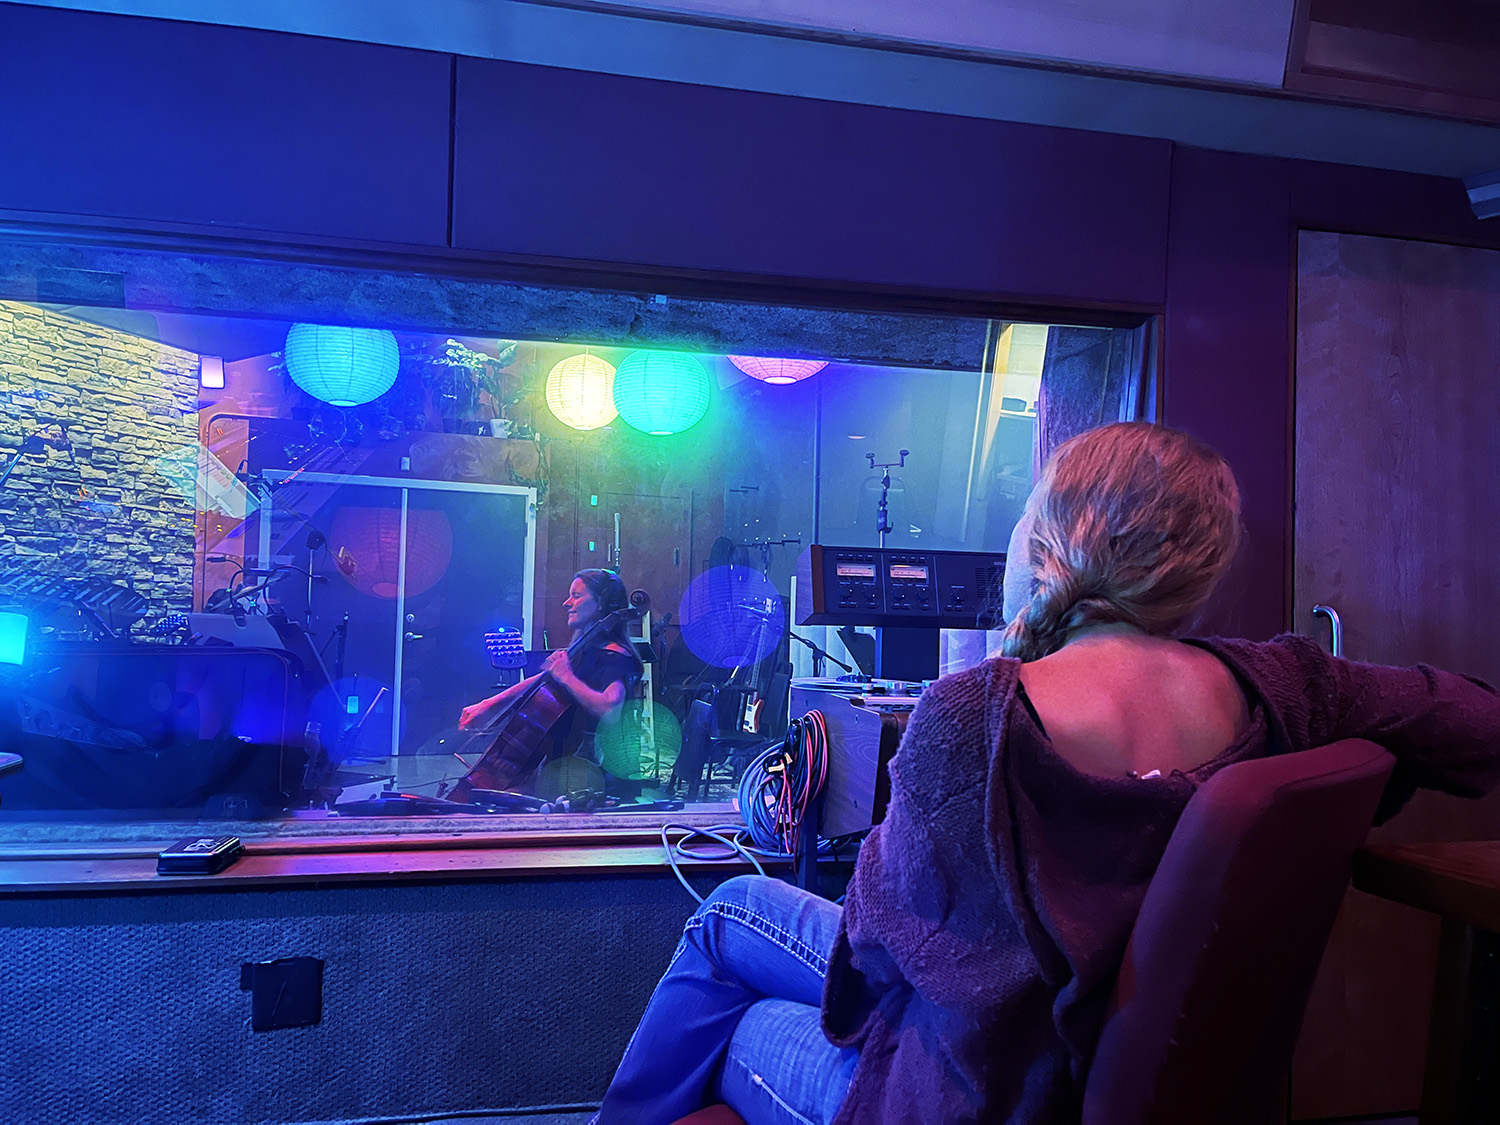
Mai Bloomfield playing on Karen Muggli’s song.
You may be asking, what if you didn’t use a click track? Well, if you didn’t use a click track then there is no grid. That changes things a bit. It’s really a give and take. Using a click track can make things a little more antiseptic or stiff. Having to play to or “chase” a computer click can feel odd sometimes. If you want to use a click track, make sure you choose a drummer and musicians that can play along with that click track with a human feel.
This is an art form in itself and not everyone can do it. I guess the goal is to think of the click track as like some really cool percussionist over in the corner with a cool fedora! Maybe they’re playing cowbell with the most amazing groove you’ve ever heard. If you can trick your mind into grooving with the click like another person, sometimes you can achieve something pretty special with a click track.
Not using a click track can be really liberating in the moment of recording basic tracks; however, it makes every moment after that a little more difficult. On one hand, you don’t have something clicking along or counting for you. That can make things like breaks or rubato moments more difficult to navigate in tracking and overdubbing. Using a click and not using a click can both be very effective, but they are different approaches. Choose the one that works best for you or if you can just decide from song to song. Some songs want to breathe in the tempo. The chorus wants to be a little faster than the verses and so on. The click can inhibit that. There is no right or wrong answer. It’s up to you in the moment and in the song.
Anyway, back to editing. If we have used a click, I will start by listening to every take with all of the elements turned up. At this point, I make notes about each take and which parts are stronger for different elements on different takes.
Once I’ve got my notes straight, I will generally start to listen through each individual element. Very often the drums are tight on one take when the bass and guitar are better on other takes and so on and so on. If you’re just working with a vocal and guitar that were recorded at the same time, then it’s just about finding different sections that work for both and moving the guitar and vocal together from take to take.
Editing is an art form in itself. Sometimes it takes time to get good at it. What you’re trying to do is edit all of the elements together so that they sound like they were naturally played together and so that there’s an orchestration or a plan to the way things unfold in the song. For example, if you leave the first verse pretty sparse and add something new for each verse, you can build dynamics and tell a story. Every section should handoff to the next and should frame the vocal or melody. When I’m editing, that’s what I’m thinking about. How does this serve the song best and how does this element talk to that element. How do they all speak to the drums and vocal and so on and so on.
I feel like I’m speaking in some ambiguous terms here, but that’s really the best anyone can do. Editing is different in every section of every song on every record I do. To tell you there is some rule would be a discredit to you. There are no rules. It’s all about creating energy and emotion and serving the message and melody of the song. It’s the same as I’ve been saying before. You’re making soup. You’re creating a painting. Flavors and colors need to be balanced and complementary to each other. Editing the basic tracks creates the foundation of the song. Again, whether you’ve used a full band or just one or two people, recording and editing the basic tracks carves out the musical and emotional map of the music.
Okay, your basic tracks are all edited! Congratulations! Now it’s time to share them with the rest of the band or client.
I generally like to edit the tunes, on my own, into what I call version one. I will share that with the appropriate folks and ask for feedback. Once I get that feedback, I will make edits and tweaks that reflect what the client or other band members want. Sometimes we disagree or sometimes musicians or clients want to change something for reasons other than musical. Those are just a case-by-case things and it’s up to the artist and producer to make those calls.
This is where choosing people with really good attitudes comes in handy. This is also where having your own really good and open attitude is a really good idea. Feedback can be difficult, and people say things in odd ways sometimes but generally they’re on to something. Check it out and be open to learning something.
Congratulations again! Your basic tracks are edited, and everybody is happy with the performances and vibe. Now it’s time to begin the overdub process.
What is overdubbing? Overdubbing is a term that came from the old tape days. What’s happening is that the edited basic tracks are playing back while one or two or several people add more parts to the track or song. Multi-track recording allows us to record more elements to something that’s already been recorded. None of the previous tracks are recorded over. Also, the tracks that are added are done so in a way that allow the engineer, producer, and artist to have complete control over them separately from each other and all of the basic track elements as well.
At this point, we can fix anything that the musicians wanted to fix in the basic tracks and start to layer new elements into the song to support the vocal and melody.
Once the basic tracks are done, you can really hear what flavors and colors need to be added to the soup. That’s what overdubbing is. I like to start by overdubbing or fixing any rhythmic elements such as drums, bass, rhythm, guitar, even things like piano are usually are part of the rhythm section. It’s good to get those things squared away before you move onto the more melodic side.
One thing overdubbing does is allow you to use different kinds of microphone setups to help with depth and width in the mix. A lot of folks will do guitar overdubs with the same guitar they used in the basic tracks. Sometimes using the same flavors and colors redundantly can create an unbalanced mix. Try to use different amps, instruments, and rooms to create different colors and flavors for your painting or soup.
If I’m overdubbing an electric guitar part, sometimes I will set it up in a big room with a mic on the amp and also a room mic or two to create width in the mix. You can put the amp on the left and the room mic on the right to make it sound like you’re standing in the middle of the room with the guitar player, which can be really visceral and emotionally effective.
This can work with all sorts of things. I like to do that with string instruments and horns as well. Room mics on a Hammond organ or a piano, too! Hell, I love room mics on everything. It’s cool to get all sorts of different data in the overdub process that can be either used or discarded in the mix. Being able to decide later what’s stereo or mono, deep or wide, tall or short is a huge plus in in the mix down process.
Over the years I’ve gotten better at knowing what kinds of fancy micing and different instruments to apply to which situations. That just comes with time and is all about trial and error. I’ve been doing this for 40 years. I’ve seen some stuff. Lol.
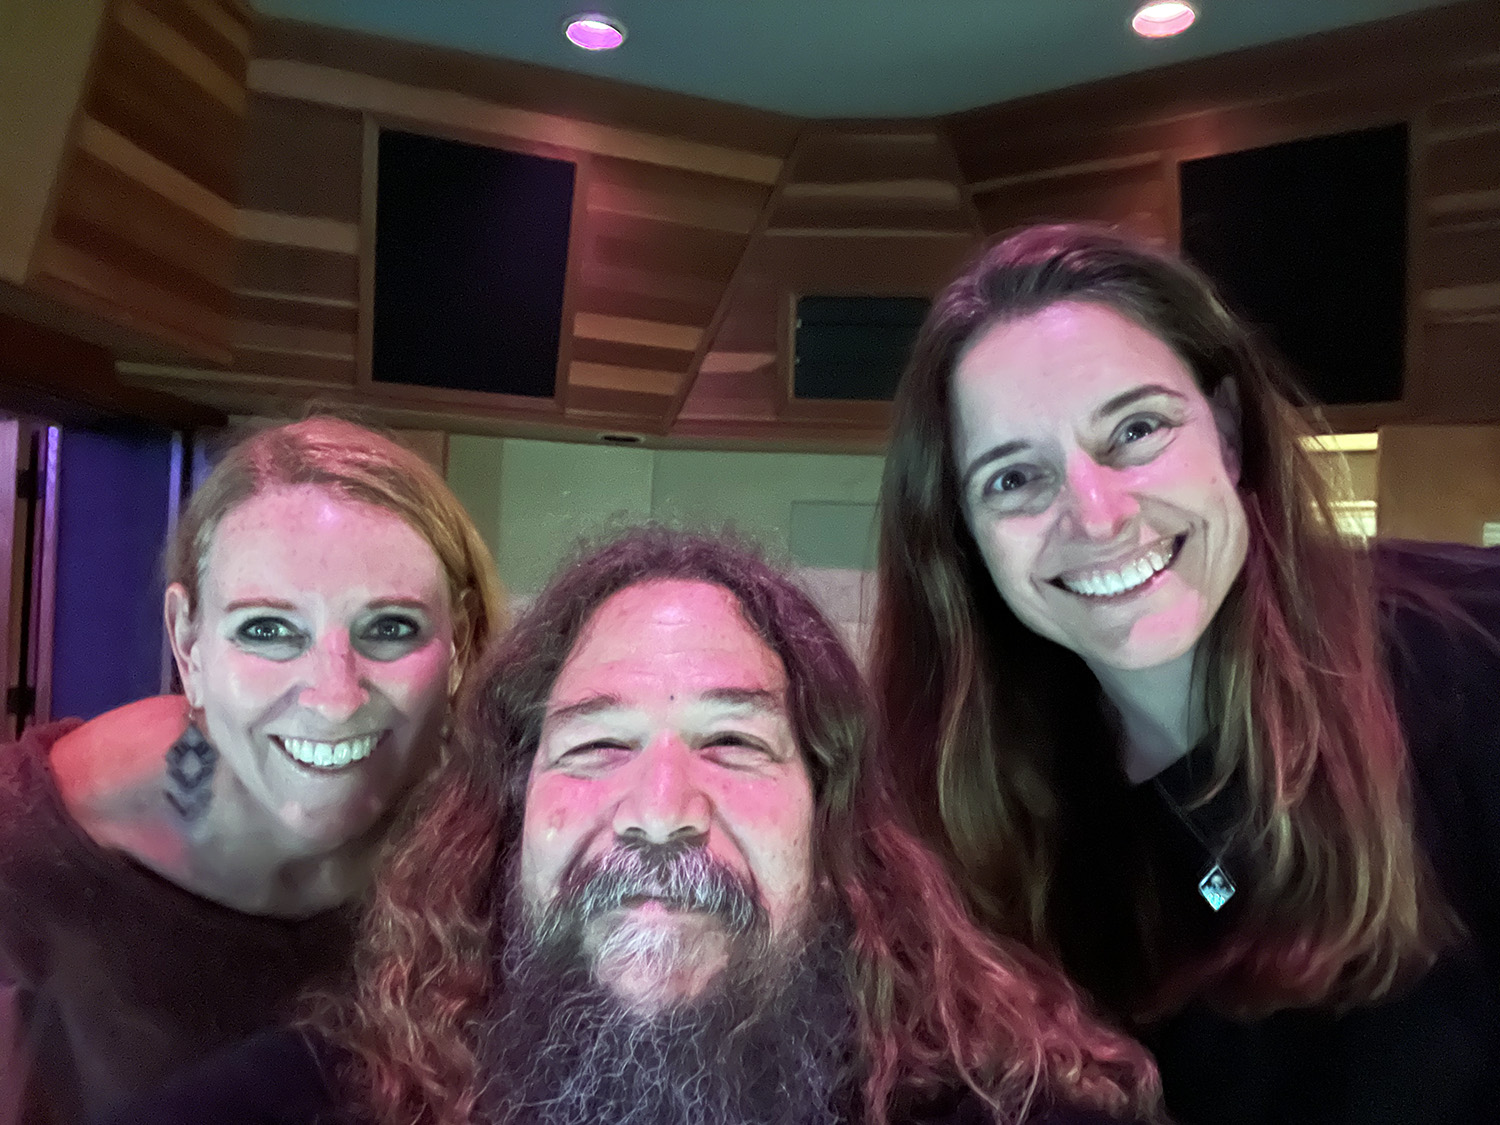
Karen Muggli, Jeff Berkley, Mai Bloomfield.
As a guitar player, I’ve learned how to orchestrate tracks by using different guitars and thickening agents for different sections of the songs. It’s great to bring in wider and bigger guitars in the choruses and have things tighten up in the verses. It’s great to use a different guitar for the solo than you did for the rest of the song. This is just all about what you’ve got around and how you use it. Everybody has different tools. Everybody uses them in different ways. If you’re a keyboard player then you’re using a completely different set of colors. There is no right or wrong. Over the years I’ve learned to paint with all sorts of instruments other than guitar. Expand your horizons. Get out of your comfort zone.
The overdub process gives us a time to slow down and get very specific and intentional about the elements that are added. I really only have one litmus test. Am I about to add something that makes everybody go “YES, I LOVE IT” if it’s not really working for you then keep trying to find the part, you’re not there yet.
After each overdub session, there comes the inevitable editing session. I like to edit each thing as we do it so that we can move forward knowing what’s there. That doesn’t mean that things don’t get changed or replaced once they’re in the track but, for the most part, we’re trying to build as we go.
Recording takes in the overdub process is very similar to recording them in the basic track process. We want to get as many as we can while the vibe is still groovy. The artist, producer, engineer, and anyone in the room all work together to get beautiful, heartfelt performances that can be edited later.
The overdub sessions are easier to edit and usually go pretty quickly. Many times, everyone has already agreed on which take is best for things like solos and that sort of thing. It’s really just a matter of getting them into the timeline and making sure they are edited correctly. Learning how to use your software is essential. If you want to do this, you’ve got to get good at editing.
So, now you’ve gotten the song completely recorded and edited. You’ve recorded basic tracks, overdubbed rhythm section things, and overdubbed melodic instruments like guitars and keyboards or even strings and horns. Now it’s time to overdub vocals.
As I’ve said before, it’s really good to have a scratch vocal sung during the basic track recording. This allows folks to have a vocal take to play off of, so they can frame that vocal well. Sometimes the vocalist nails the lead vocal in the basic tracks, so they’re already recorded and edited, but very often the vocalist wants another crack at it after everything is recorded and edited.
There’s a good reason for this. Sometimes the track is not as inspirational to sing to in the basic track sessions. Sometimes the overdub process allows us to add power and vibe to the song, so the vocalist feels more supported and can really go for it.
Next month, we will go into recording and editing vocals and backing vocals. Every vocalist and every record are different. There’s a lot to cover. I can’t wait to talk about it with you all.
The recording process has changed over the years in many ways. However; it hasn’t changed in the most important ways for me. It’s still about capturing a moment of musical and emotional clarity that translates into the soul of the listener.
Recording matters!
Jeff Berkley
619-957-3111
www.jeffberkley.com